
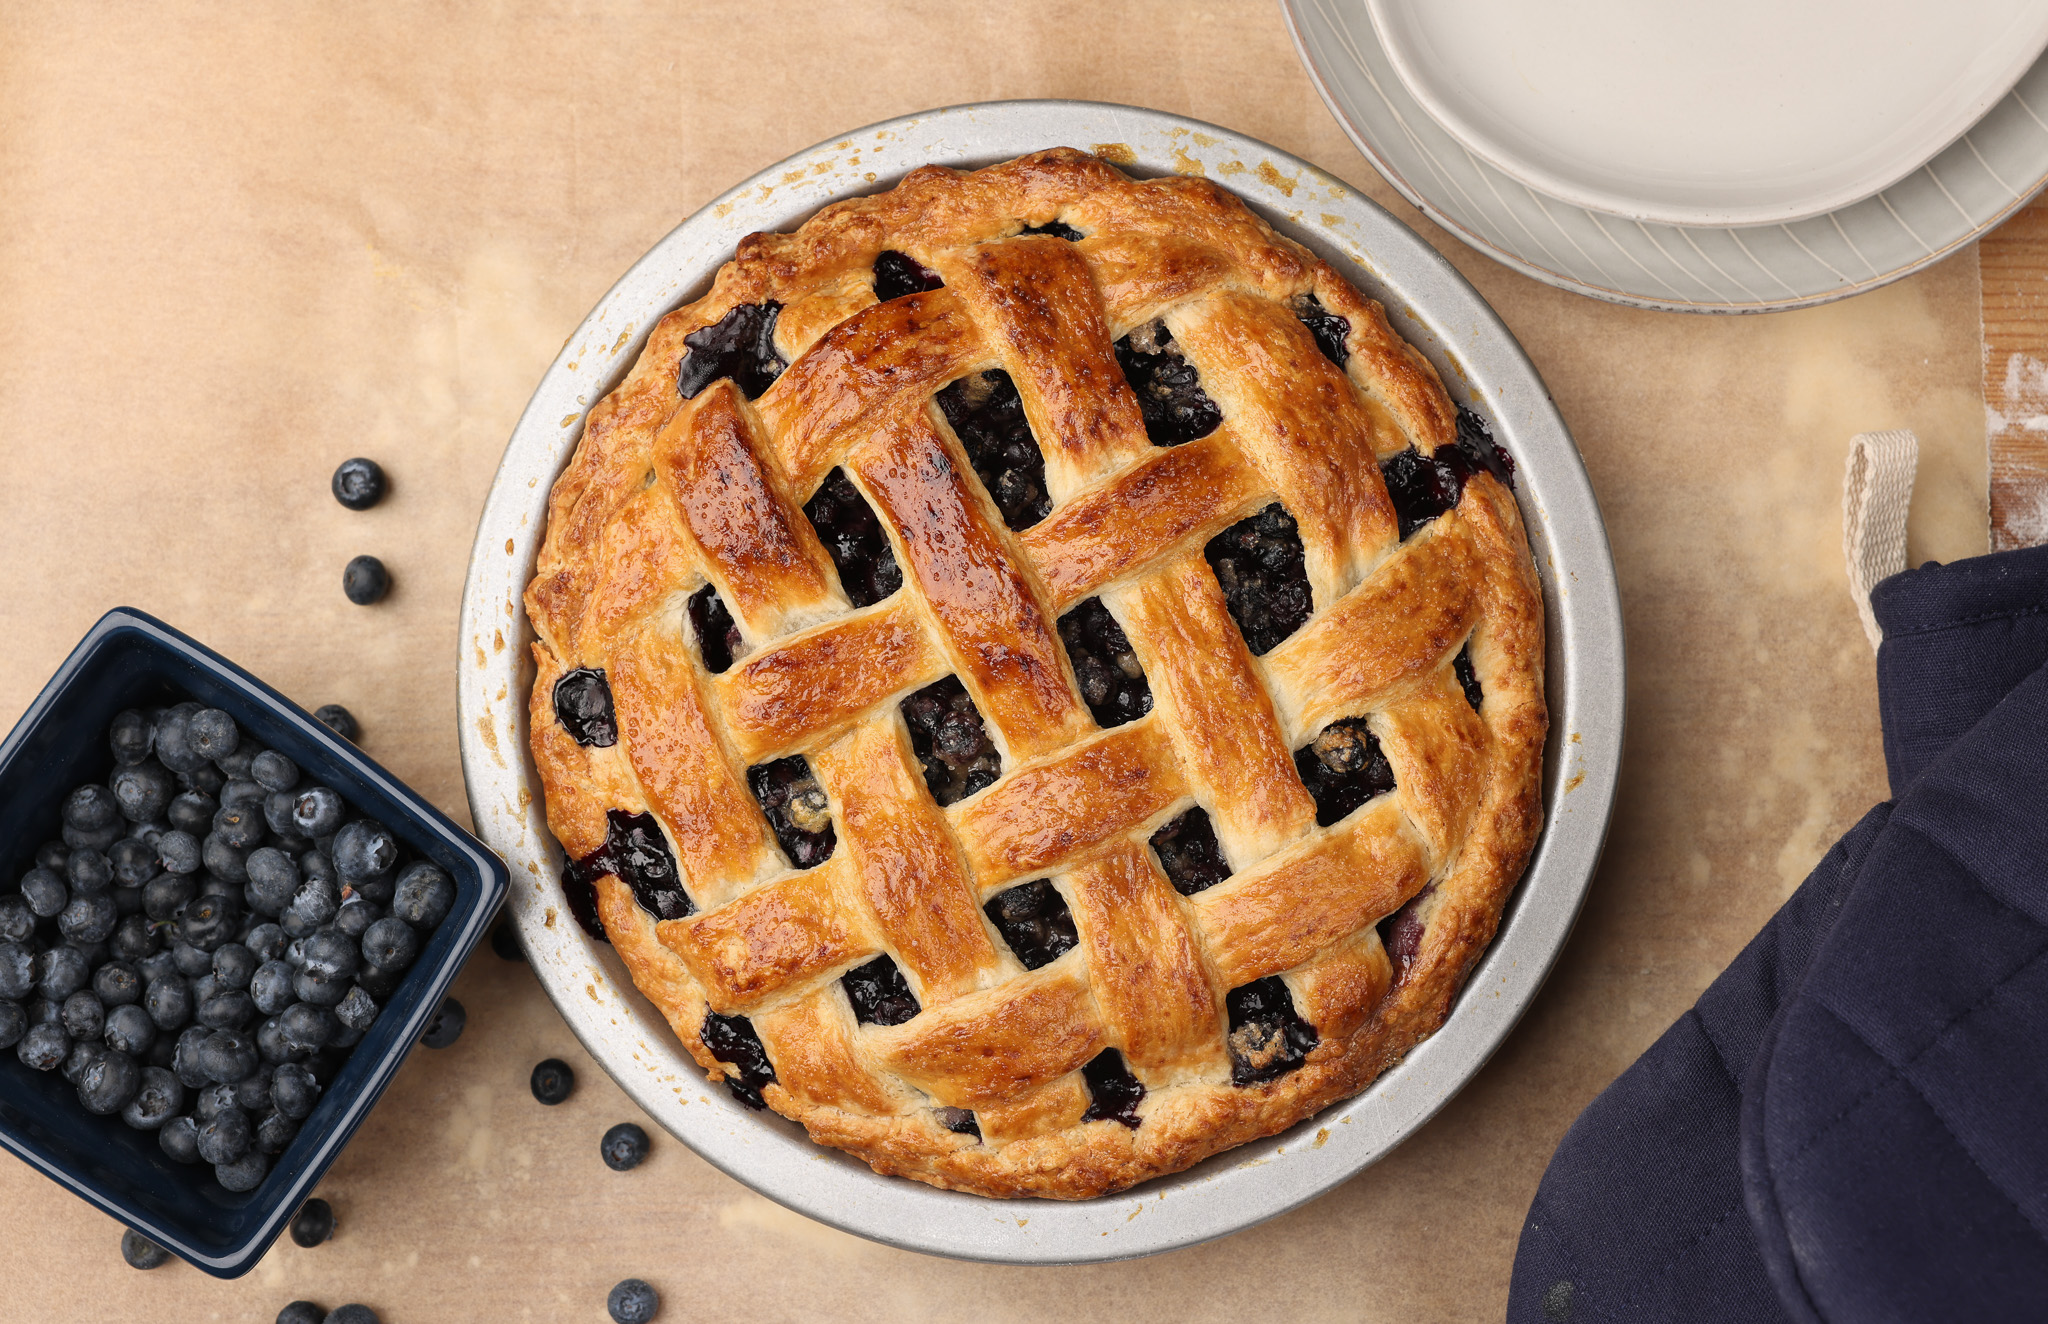
Homemade Blueberry Pie

A delightful, decadent Blueberry Pie Recipe! It’s surpisingly simple to make, bursting with fresh, juicy berries and topped with a classic lattice crust. I just love to see the blueberries peeking through the crust!
If you love making pie from scratch, Fall is a wonderful time to try my Apple Pie. But for now, it is blueberry season in Upstate New York, and I am celebrating with a big slice of Homemade Blueberry Pie. Let me show you how it's done!
Blueberry Pie Recipe
Blueberries are always a treat, but they are especially delicious when they are in season. They are even my chicken's favorite snack -- who can blame them?!
The best part about this pie is that is it incredibly simple. Other fruit pies require a lot of prep work (I'm looking at you, Peach Pie, Cherry Pie and Apple Pie!), this blueberry pie filling is practically effortless. Freshly washed blueberries get tossed in a mix of sugar, a hint of cinnamon, vinegar, a pinch of salt, and flour and cornstarch for just the right consistency. Even the crust comes together in an instant!
I always use my favorite pie crust recipe, which is easy to make, buttery, and perfectly flaky. I even use this recipe for savory applications, like a quiche. The small amount of sugar helps the crust brown nicely while it bakes, it doesn't give it a very sweet taste, so it's an all-purpose crust!
Now, let's talk pie pans.
I have more of the beautiful ceramic pie dishes than I can count. They are visually so beautiful, but not always the best choice for actually baking your pie. Due to the thickness of the ceramic dish, the bottom of the crust tends to steam, rather than bake.
For a strudy crust, I prefer to use a simple pie dish, like this USA Pan one. I know, I know, it's not exactly a showstopper, but thanks to the proper heat conduction, your pie will be!

Blueberry Pie Ingredients
Scroll down to the recipe card below this post for ingredient quantities and full instructions.
- Pie crust – Use this recipe for pie crust. One recipe makes enough for both the top and bottom crust.
- Blueberries – In season, organic is best.
- Vinegar or lemon zest – Use whatever you have on hand. I have used Apple Cider Vinegar, White Vinegar and Lemon Juice.
- All-purpose flour – This thickens the filling as the berries release their juices.
- Cornstarch -- Works with the flour to create a filling that isn't too runny.
- Sugar – I used an organic granulated sugar.
- Cinnamon – Just a hint of compliments the blueberries beautifully.
- Salt -- To balance and enhance the flavors.
- Egg – Whisk this with water to create an egg wash for the crust.
How to Make Blueberry Pie
It’s time to roll up your sleeves and get baking. Here’s what you’ll need to do.
- Make the crust – Follow theand chill the dough for at least an hour. Temperature is key, so make sure your pie crust is well chilled before working with it. Roll the first disk into roughly a 12-inch circle and carefully transfer it to a 9-inch pie pan.
- Prepare the lattice strips – Roll the remaining pie crust into a 12-inch circle. Slice it into 10 strips (1-inch wide).
- Preheat the oven – Position a rack in the center of the oven and preheat to 425ºF.
- Make the filling – Toss together the filling ingredients and pour the mixture into the pie crust, mounding it slightly in the center.
- Weave the lattice crust – Use the strips of dough to create a lattice top, then pinch the edges to seal the crust and crimp.
- Make the egg wash – Brush the egg wash over the top crust.
- Bake – Bake the pie at 425 for 25 minutes, then reduce the heat to 350 degrees and continue to bake for 45 to 50 minutes, or until the crust is golden and the blueberry filling is bubbling.
- BE PATIENT! -- This last step is the hardest, but possibly the most important. Let your pie cool completely, for at least two hours, for the filling to set. If you cut into it while hot, all of the wonderful juices will run out of the pie.


Homemade Blueberry Pie
A wondefully sweet Blueberry Pie Recipe! The ultimate nod to Summer, bursting with sweet, juicy blueberries and a flaky crust.
Cook Mode keeps your screen awake while you follow this recipe, so you won't have to keep tapping your screen with messy hands. No more screen timeouts while you're mid-recipe! Just activate Cook Mode before you start cooking, and your recipe will stay visible until you're done.
Pie Crust (makes top and bottom):
2 1/2 c all purpose flour
2 tbsp sugar
1 tsp salt
1 c unsalted butter, cubed
1/2 ice water, as needed
Blueberry Filling:
5 c fresh blueberries, washed and picked over for stems
2/3 c granulated sugar
1/3 c all purpose flour
2 tbsp cornstarch
1/2 tsp salt
1 tsp cinnamon
2 tbsp vinegar or lemon juice
2 tsp vanilla extract
Intstructions
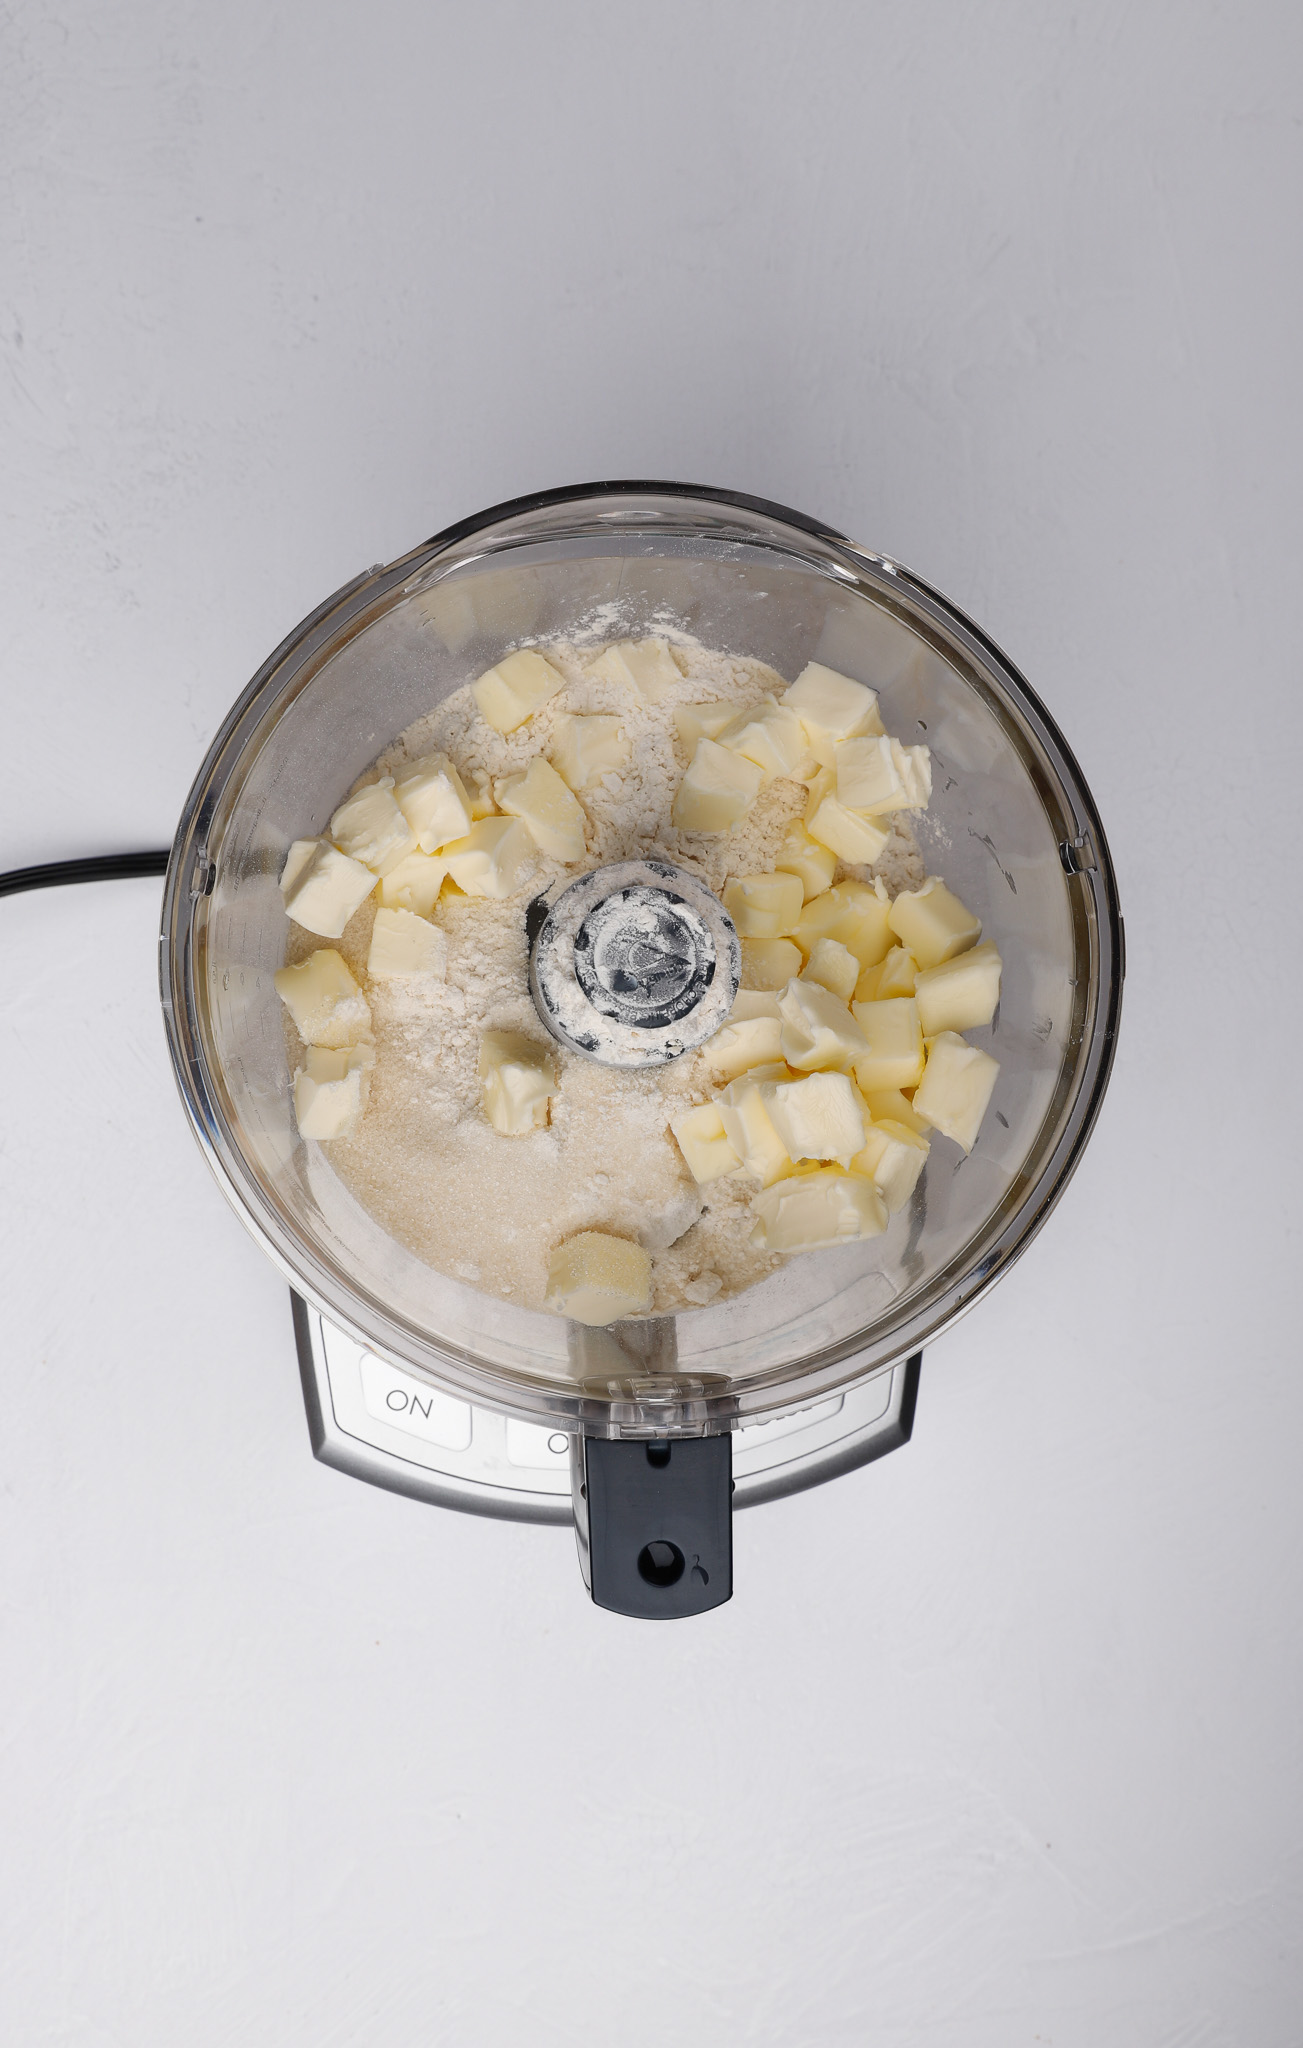
Step One: Make the Flaky Pie Crust
Start by placing your flour, sugar, and salt into the food processor and pulsing them a few times until
combined. Now, add your cubed butter. The key to this flaky crust is COLD ingredients, so, be sure to cube
your butter ahead of time and let it chill in the freezer for a few minutes before you start baking.
Once the butter is in, pulse the food processor a few times just until you see roughly pea-sized
clumps of butter. Then, continue to use the pulse setting while you slowly stream in ice water. Stop once
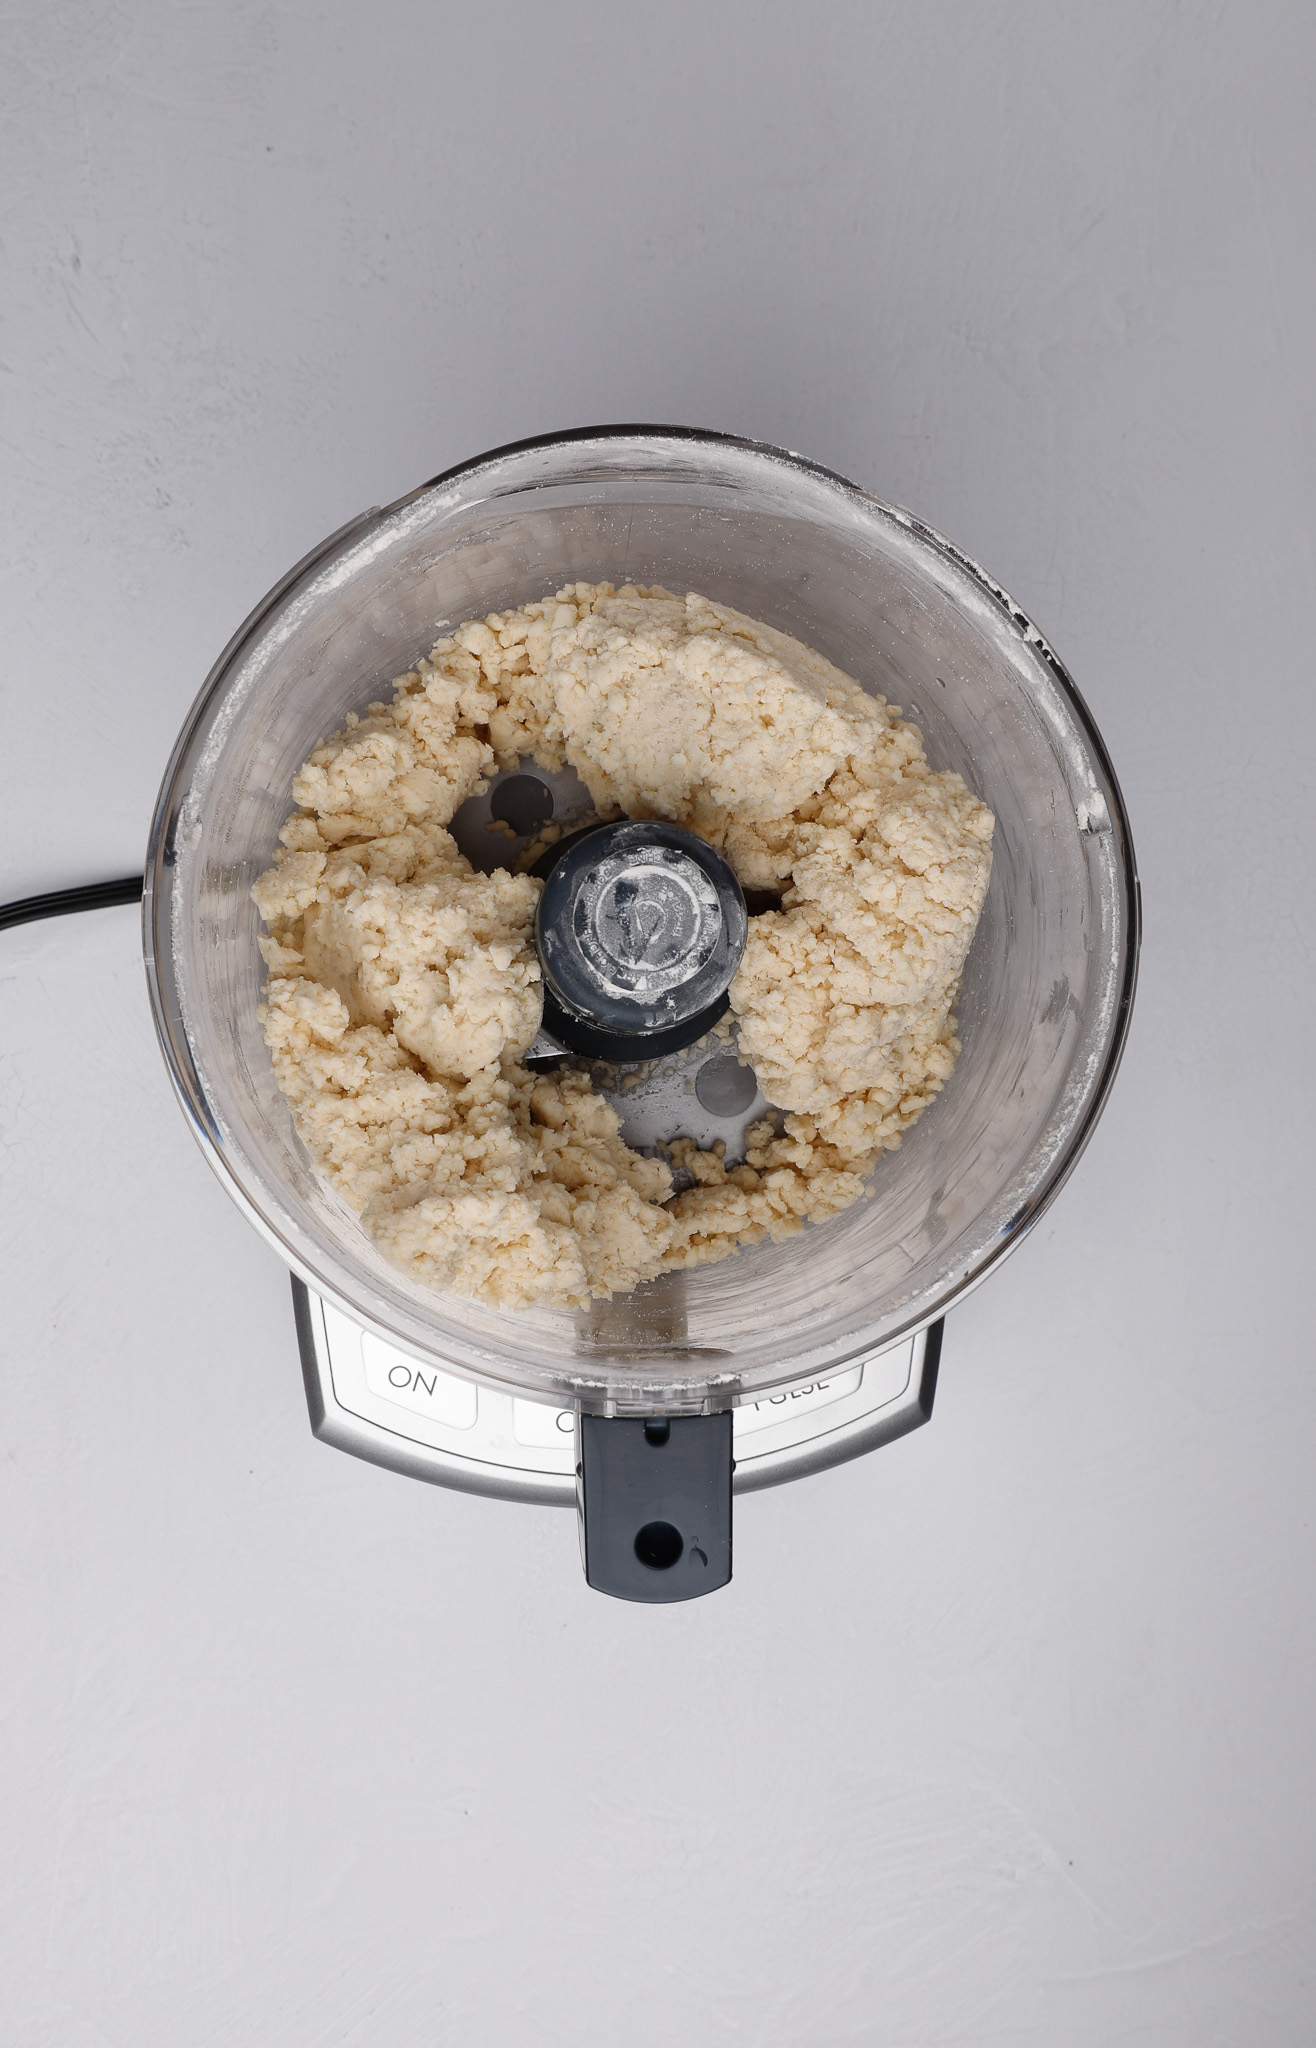
a rough, crumbly dough starts coming together.
Sprinkle flour on a cutting board or directly on your countertop, and then turn the pie dough out of the
food processor. Begin pressing the crust into itself. While you bring the crust together, stack it in layers
and press them together. This creates lamination in the dough, giving you a beautiful, flaky crust.
Finally, form the crust into a rectangle, wrap it in plastic wrap, and stick it in the fridge to chill for at least one
hour.
Step Two: Make the Blueberry Filling
In a large bowl, toss together the blueberries, sugar, flour, cornstarch and cinnamon. Give this all a good mix and then add the vanilla extract and vinegar or lemon juice. Liquid is what will activate the cornstarch, so I like to press down and burst some of the blueberries when mixing. Set this mixture aside while you prepare your pir crust.
Step Three: Prepare your Pie Crust
Divide the crust in two and on a flour surface, roll the disk into a 12-inch circle and carefully transfer it to a 9-inch pie pan. Place in the refrigerator while you make the lattice strips.
Roll the remaining pie crust into a 12-inch circle. Use a pizza cutter or pastry roller to slice it into 10 strips (1-inch wide).
Position a rack in the center of the oven and preheat to 425ºF.
Step Four: Assemble the Pie
Remove your pie crust from the refrigerator. Transfer your filling mixture into the pie crust, mounding it slightly in the center.
Place 5 strips of dough over the pie crust, with the longer strips in the center and shorter strips towards the edges.
Fold back every other strip halfway and place a long strip in the center perpendicular to the first 5 strips.
Fold the strips back over the new line and fold back the alternate strips. Continue adding and alternating strips, then switch to the other side of the pie and continue until the lattice is complete. Trim any crust the hangs over the edge of the pie pan. Then, fold the crust inward, pinch the edges to seal the crust and crimp.
Beat the egg and with a pastry brush, brush the egg wash over the top crust.
Bake the pie at 425 degrees for 25 minutes, then reduce the heat to 350 degrees and continue to bake for 50 to 60 minutes, or until the crust is golden and the blueberry filling is bubbling.
If at any point the crust becomes too dark, cover it with aluminum foil or a piece of parchment paper. It is imperative that the pie bakes for the whole time, so that the filling cooks properly and has a thick, not runny, texture.
Step Four: Let Cool
Once the pie has baked, remove from the oven and let cool for at least two hours. Store at room temperature for up to 3 days.
.webp)
Meet Jessica!
I believe that a meal is always about so much more than a plate of food. It is about honoring food producers, perfecting technique, finding harmony between ingredients. Most importantly, it is about sharing it with those you love.
Related Recipes
1.JPG)


%20resized.JPG)
.JPG)
Kitchen Must Haves

Homemade Blueberry Pie

Real results from real customers

Lorem ipsum dolor sit amet, consectetur adipiscing elit. Suspendisse varius enim in eros elementum tristique. Duis cursus, mi quis viverra ornare, eros dolor interdum nulla, ut commodo diam libero vitae erat. Aenean faucibus nibh et justo cursus id rutrum lorem imperdiet. Nunc ut sem vitae risus tristique posuere.


Never miss a recipe!
Be the first to know when a new recipe drops!
.webp)